How to Open a Seller Account on Blinkit: A Step-by-Step Guide

How to Open a Seller Account on Blinkit: As the demand for online grocery shopping continues to surge, platforms like Blinkit (formerly Grofers) offer excellent opportunities for retailers, small businesses, and startups to connect with a larger audience. Selling your products on Blinkit can significantly expand your reach and boost your business. This guide provides a detailed step-by-step process to create your seller account on Blinkit, manage products, and start making sales.
Why Sell on Blinkit?
Before diving into the registration process, let’s explore the key benefits of selling on Blinkit:
- Access to a Large, Engaged Customer Base Blinkit has a vast and growing user base, making it a perfect platform to increase your product’s visibility with minimal marketing efforts. With online grocery shopping on the rise, reaching new customers has never been easier.
- User-Friendly Seller Portal The Blinkit Seller Portal is designed for simplicity, making it easy to list products, manage orders, and track performance, even for first-time sellers.
- Efficient Logistics and Delivery Support Blinkit handles all the logistics and delivery, allowing you to focus on sourcing, managing, and marketing your products while the platform ensures fast and reliable order fulfillment.
- Actionable Data and Insights Blinkit Seller Dashboard provides valuable analytics and insights, enabling you to optimize pricing strategies, inventory management, and marketing campaigns.
How to Open a Seller Account on Blinkit: A Step-by-Step Process
Follow these simple steps to get started with your online grocery business on Blinkit:
Step 1: Visit the Blinkit Seller Portal
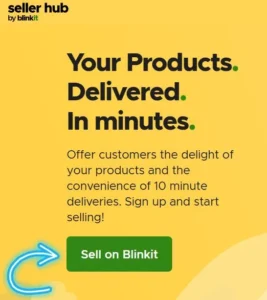
To begin, head over to the Blinkit Seller Portal and start the registration process by clicking on “Sign Up”.
Step 2: Create Your Seller Account
Once you’re on the portal:

- Click on the “Sign Up” button.
- Provide your email address and create a secure password.
- You can also sign up using your Google or social media accounts for added convenience.
Step 3: Fill Out Business Information
After signing up, provide the following details about your business:
- Business Name: Enter the name your business operates under.
- Business Address: Provide your complete business address for verification.
- GST Number: Required for businesses registered for GST.
- PAN Number: Essential for tax purposes.
- Bank Account Information: Add your bank details to facilitate payments.
Step 4: Upload Required Documents
To verify your business and activate your seller account, upload these essential documents:
- GST Certificate: Verifies your GST registration.
- PAN Card: Required for tax identification.
- Business License: Any relevant licenses, such as FSSAI for food businesses, should be included.
Ensure all documents are clear and legible to avoid delays in account approval.
Step 5: Add Your Products
Once your account is approved, you can start listing your products. Follow these best practices:
- Product Title: Use SEO-friendly, descriptive titles that include key search terms.
- Product Descriptions: Write compelling descriptions that highlight key features, ingredients (if applicable), and usage.
- High-Quality Images: Use professional images showing the product from multiple angles to attract customers.
- Competitive Pricing: Research pricing trends and set competitive prices that reflect both your costs and market demand.
- Stock Availability: Keep your inventory updated to prevent overselling.
Step 6: Manage Inventory
Managing inventory is crucial for smooth operations:
- Use inventory management tools within the seller portal to track stock levels.
- Set up low-stock alerts to ensure timely replenishment.
- Regularly update listings based on seasonal trends or demand fluctuations.
Step 7: Fulfill Orders Efficiently
Once you start receiving orders, follow these steps to fulfill them:
- Track Orders: Monitor orders in real-time via the seller dashboard.
- Pack Securely: Ensure products are packaged safely for delivery.
- On-Time Dispatch: Fulfill orders promptly to maintain customer satisfaction and positive ratings.
Step 8: Provide Excellent Customer Service
Customer service is vital for building a loyal customer base:
- Respond promptly to any customer inquiries or complaints.
- Offer solutions like refunds or replacements if necessary, maintaining a professional and customer-first approach.
Step 9: Leverage Blinkit’s Seller Support Resources
Blinkit offers several resources to help you grow:
- Participate in webinars, training sessions, and workshops to stay updated on best practices.
- Use the Blinkit Seller Support team for guidance on improving your sales strategy.
Step 10: Stay Compliant with Blinkit Policies
Ensure your business adheres to Blinkit’s selling policies:
- Review Blinkit’s terms of service regularly to avoid penalties or account suspension.
- Keep up with policy updates to ensure compliance and avoid disruptions in your sales.
Conclusion
Opening a seller account on Blinkit is a great opportunity for businesses looking to tap into the booming online grocery market. By following this step-by-step guide, you can register, list products, and start selling with ease. With Blinkit’s extensive customer base, user-friendly interface, and reliable logistics support, you’ll be well-positioned to expand your business.
Get started today and take advantage of the online grocery shopping trend to grow your business on Blinkit!


